
Top 10 Photography Spots in Shimla: Insta-Worthy
Rahul Garg
February 18, 2026
Discover the best photography spots in Shimla. From The Ridge & Christ Church to Toy Train & Viceregal Lodge. Capture stunning shots of the Queen of Hills.
Photography Spots Shimla: Practical Shot Planning for Every Season
Shimla is one of the easiest hill stations in North India for photography-focused travel because you can mix architecture, street life, ridge viewpoints, and forest edges in a compact circuit. The biggest mistake visitors make is chasing too many locations without light planning. Better results come from fewer spots with stronger timing. If you are building a complete city day, combine this guide with things to do in Shimla, short-route ideas from one-day Shimla plans, shopping breaks via Shimla markets, and stay planning from Airbnbs in Shimla. This guide focuses on usable photo strategy, not generic spot lists.
How to Plan a Photo Day in Shimla
Use a three-block structure: early light for wide city frames, mid block for architectural and street detail, and evening for atmosphere shots. This prevents random movement and improves frame variety. Keep walking buffers because elevation and crowd movement can slow transitions.
High-Value Spot Types
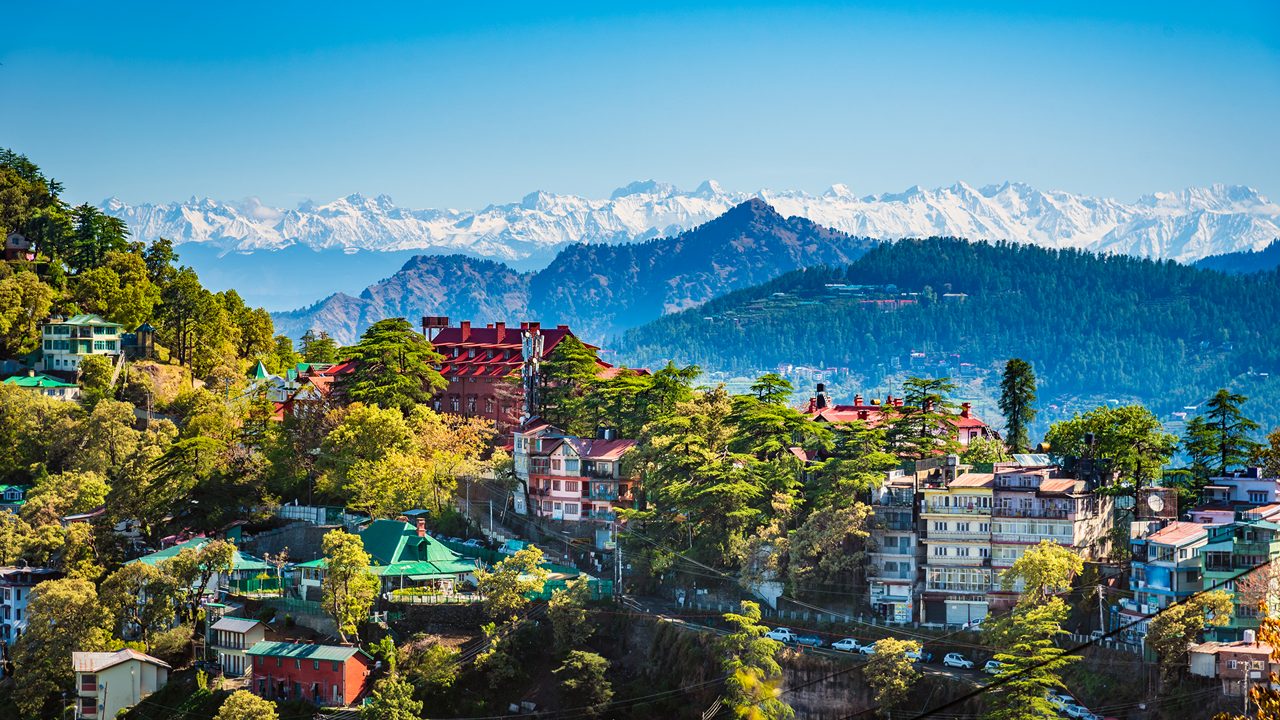
Ridge and skyline frames
Good for wide compositions with layered hills and iconic city texture.
Church and colonial architecture details
Use side-light windows for texture and controlled highlights.
Street and market storytelling
Capture movement, signage, and local rhythm without blocking pathways.
Toy-train and transit visuals
Plan timing in advance to avoid missing movement frames.
Best Time by Season
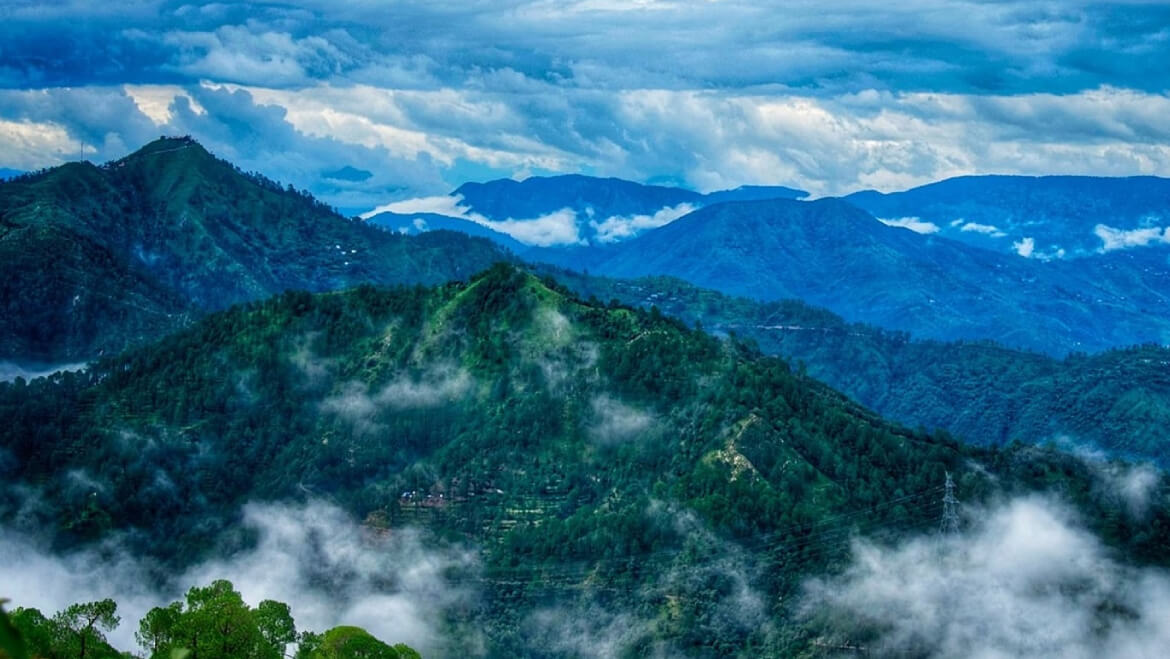
Each season changes Shimla’s visual language. Winter gives clean contrast and mist layers, summer gives crowd energy and brighter scenes, monsoon gives mood but increases equipment and movement risk. Choose your style before you choose your route.
| Season | Visual Strength | Challenge |
|---|---|---|
| Winter | Crisp atmosphere, strong texture | Cold battery and hand stability issues |
| Summer | Lively street scenes | Crowd density at prime viewpoints |
| Monsoon | Mood and fog depth | Rain protection and slippery movement |
Gear and Mobile Setup Tips
Whether you shoot on phone or camera, keep kit minimal and weather-ready. Carry lens cloth, power bank or spare battery, and rain cover. In hill stations, overpacking slows you down and reduces shot quality. Stability and timing matter more than heavy equipment.
- Use one wide and one medium focal approach.
- Shoot burst frames in windy or low-light moments.
- Protect gear from sudden fog and rain shifts.
- Keep memory and battery headroom for evening block.
Suggested Half-Day Shot Sequence
Start with open-ridge visuals, shift to architecture details, then move to market storytelling. End with twilight or blue-hour frames at one predictable location instead of running across town late. This sequence gives a balanced portfolio in limited time.
Ethical and Practical Photography Etiquette
Do not block public pathways or disturb worship areas while shooting. Ask before close portraits. Keep session durations short at shared viewpoints. These habits improve local interaction and reduce friction during crowded hours.
How to Pair Photos with Travel Experience
Photography days can become stressful if every minute is output-driven. Keep one non-photo break for food, walking, or market browsing using local shopping routes. A balanced day improves creativity and focus in later sessions.
Common Mistakes to Avoid
- Arriving at major spots only at peak crowd times.
- Skipping weather protection for gear.
- Trying to cover too many spots in one day.
- Shooting only wide frames without details.
- Ignoring walking fatigue in hilly routes.
Final Takeaway
The best photography spots in Shimla are less about secret locations and more about timing, sequence, and discipline. Pick fewer locations, plan light windows, and keep your movement realistic.
A focused photo day in Shimla will outperform any rushed 10-spot checklist.
Protect your gear, respect local space, and keep one buffer in your schedule.
Consistent planning is what creates consistently strong frames.
Detailed Shot-Planning Workflow
A good Shimla photography day starts with shot intention, not location chasing. Decide your output goals first: architecture detail, street life, panoramic ridge frames, or travel portraits. Once your goal is clear, select 3-4 spots max and assign each a light window. This reduces travel stress and increases frame quality. Photographers who follow this method return with stronger storytelling variety than those trying to cover every known spot.
Weather and Light Management
Mountain weather changes quickly. Build a plan with adjustable spot order so cloud cover or crowd spikes do not break your day. Keep one indoor or sheltered stop in your schedule as a weather fallback. For overcast days, focus on texture and mood. For bright days, use side light and controlled exposure to protect highlights.
- Carry lens cloth for fog and drizzle.
- Keep a compact rain cover for camera/phone.
- Use power-saving settings to extend battery life.
- Pause for 5-minute composition resets between locations.
Travel-Ethics for Public Photography
Ask before close portraits, avoid blocking lanes, and keep tripod setups brief in crowded zones. Respect spaces of worship and local routines. Ethical behavior improves community response and gives you a more sustainable photography experience. Great travel images come from patience and respect, not only equipment.
Final Planning Principle
In Shimla, fewer well-timed spots produce better results than long rushed lists. Protect your light windows, manage fatigue, and stay flexible with weather. This combination consistently produces cleaner, richer image sets.
Extended Planning Playbook
Strong travel outcomes usually come from preparation habits, not from adding more destinations. Use a layered plan before departure: define one primary objective, one secondary objective, and one fallback option. The primary objective is what makes the day worthwhile even if weather or delays affect everything else. The secondary objective is optional and should be dropped quickly if timing slips. The fallback option should be low-risk and close to your route so you can still have a meaningful day without forcing difficult movement. This structure reduces stress and protects experience quality.
Next, map your day in realistic blocks rather than exact minute-by-minute promises. A practical approach is to assign 90-120 minute activity blocks with 20-30 minute transition buffers. Most travelers skip buffers and then rush decisions late in the day. Buffer time is not wasted time; it is decision margin. It allows for weather delays, traffic shifts, short rest stops, or queue variation without breaking the entire plan. Trips feel smoother when flexibility is built in from the start.
On-Ground Execution Rules
Once on site, run a simple three-step check before every major movement: current weather, group energy, and daylight margin. If any of these are weak, reduce scope immediately. This is the most effective way to prevent avoidable risk. Travelers often keep original plans even when conditions change, and that creates rushed exits and lower-quality experiences. Smart travel means adapting early, not reacting late.
- Hydrate at regular intervals instead of waiting for fatigue signs.
- Keep food simple and energy-stable to avoid long unplanned breaks.
- Maintain one clear group communication rule for movement timing.
- Protect return schedules, especially in low-support or mountain routes.
- Use conservative decision-making when weather uncertainty appears.
Budget and Comfort Controls
Good itineraries also control hidden costs. Carry essential basics so you are not forced into overpriced last-minute purchases. Keep a small contingency budget for transport changes and safety-driven rerouting. Comfort planning matters too: appropriate footwear, light weather layers, and power backup improve decision quality throughout the day. Small discomforts become major problems when combined with long transit and shifting weather.
Content and Photography Balance
If you are capturing photos or video, separate documentation from exploration. Spend the first pass understanding the place, and the second pass creating content. This prevents rushed, repetitive shots and reduces unsafe positioning choices. The best travel content usually comes from patient observation rather than constant motion. When the environment is dynamic, a stable viewpoint often gives better results than frequent location switching.
Post-Visit Reset
End each day with a short reset: hydrate, review what worked, and simplify the next day’s plan based on real conditions. This keeps multi-day itineraries sustainable. Travelers who do quick daily resets make better choices and avoid cumulative fatigue. The goal is not maximum checklist completion, it is high-quality, safe, and memorable travel across the full trip.
Location
Frequently Asked Questions
Q1.What is the best time for snow photography in Shimla?
Q2.Is drone photography allowed in Shimla?
Q3.What are the best sunset photography spots in Shimla?
Q4.Are there any entry fees for photography at monuments in Shimla?
Q5.Can we take photos inside Gaiety Theatre in Shimla?
Q6.What camera gear is recommended for Shimla photography?
Q7.Which season offers the best photography opportunities in Shimla?
Q8.How do I reach the best photography spots in Shimla?
Recommended For You
15 Best Hill Stations in Himachal Pradesh
Explore the best hill stations in Himachal Pradesh with practical route planning, traveler-type recommendations, and season-wise travel tips.
Best Time to Visit Himachal Pradesh: Season-Wise Guide by Region
Find the best time to visit Himachal Pradesh with season-wise guidance for families, snow trips, road journeys, and trekking routes.
Best Photography Spots in Manali: Scenic Points & Best Light Hours
Discover the best photography spots in Manali with sunrise viewpoints, snow landscapes, heritage sites, and practical camera tips for all seasons.
Never Miss an Adventure
Get the latest trekking guides, travel tips, and exclusive offers delivered straight to your inbox.